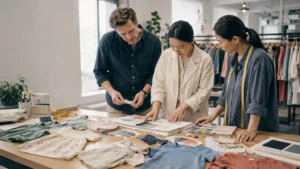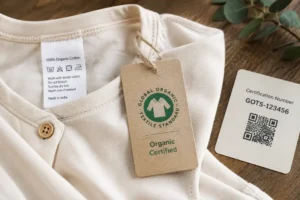
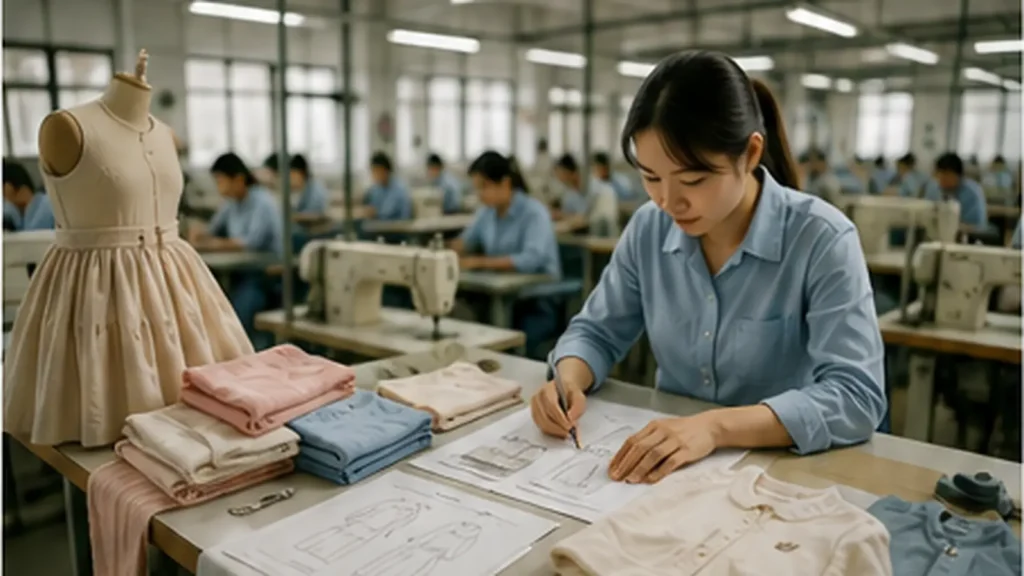
Kidswear product development connects design, materials, manufacturing, and quality control.
The kidswear OEM process begins long before fabric reaches a cutting table. It starts when you turn an idea into instructions that a pattern maker, fabric supplier, sample technician, sewing line, quality inspector, packing team, and freight partner can all understand in exactly the same way.
That shared understanding is what separates a promising design from a product that can be repeated consistently across colors, sizes, and future reorders.
At HAPA, we regularly speak with founders who assume the hardest part of production will be sewing. In reality, sewing is usually the most visible step, not the most difficult one. The real work lies in making hundreds of small decisions before bulk production begins: choosing the correct fabric weight, agreeing on measurement methods, testing a neck opening, approving a print hand feel, defining acceptable tolerances, confirming label content, and deciding how each SKU will be packed.
When those decisions are documented early, your collection has a clear path to market. When they remain vague, every department fills the gaps with assumptions—and assumptions become sample revisions, delays, rework, and unexpected costs.
This guide takes you through the complete journey from tech pack to delivery. You will see what happens at each stage, what your manufacturer needs from you, which approvals protect your order, and where experienced brands spend extra attention.
What the Kidswear OEM Process Actually Covers
OEM stands for Original Equipment Manufacturing. In children’s apparel, it generally means a factory produces garments according to your original design, specifications, measurements, materials, branding, and quality standards.
You control the product direction. Your manufacturer translates that direction into a repeatable production system.
A full program may include:
- Product feasibility review
- Tech pack development or refinement
- Fabric and trim sourcing
- Costing and MOQ planning
- Pattern making
- Prototype sampling
- Fit correction
- Size grading
- Print, embroidery, or appliqué development
- Compliance planning and laboratory coordination
- Pre-production approval
- Bulk fabric inspection
- Marker making and cutting
- Sewing and in-line quality control
- Finishing and measurement checks
- Final inspection
- Custom labels and packaging
- Export documentation
- Freight coordination and delivery
This is different from buying ready-made stock clothing. In an OEM program, the factory is not simply attaching your logo to an existing garment. The fit, materials, construction, colors, decoration, and presentation are developed around your brief.
It is also different from ODM. In an ODM project, the manufacturer may offer an existing design that you customize. OEM usually gives you greater control and stronger product differentiation, but it demands clearer documentation and more disciplined approvals.
If you are still deciding which model suits your collection, HAPA’s overview of children’s clothing OEM services explains how development can begin from a completed tech pack, reference sample, or well-defined concept.
Stage 1: Turn Your Product Idea Into a Usable Brief
Before we discuss the tech pack, it helps to clarify the commercial brief behind it. A technically complete design can still be difficult to manufacture if the factory does not understand the customer, market, price level, or intended use.
Your initial brief should answer five basic questions:
- Who will wear the product?
- Where will it be sold?
- What should it feel and look like?
- What retail price or target cost must it support?
- When must it arrive at your warehouse?
For kidswear, age range matters enormously. A sweatshirt for a two-year-old and a sweatshirt for a twelve-year-old may share a visual theme, but they require different proportions, dressing considerations, trim choices, and safety reviews.
The intended use also matters. Is the set designed for sleep, active play, school, parties, travel, or everyday wear? The answer influences fabric performance, ease, closures, construction, and potentially the compliance plan.
One recurring situation we see is a brand asking for “premium cotton” without defining what premium means for its customer. To one buyer, it means a dense 260 gsm jersey with a structured hand. To another, it means lightweight organic cotton with exceptional softness. Neither interpretation is wrong, but the factory cannot choose correctly unless the brief describes the expected result.
A useful product brief therefore includes:
- Target age and size range
- Product category and intended use
- Target market or countries
- Desired fit and silhouette
- Fabric preferences
- Required certifications or restricted-material policies
- Color direction
- Decoration techniques
- Quantity by style and color
- Target cost
- Retail launch date
- Sales channel and packaging needs
You do not need to know every technical answer on day one. You do need to explain the outcome you are trying to achieve.
Stage 2: Build a Tech Pack That Removes Guesswork
The tech pack is the working language of the kidswear OEM process. It converts your creative concept into instructions that the factory can quote, sample, measure, and reproduce.
A good tech pack is not impressive because it is long. It is effective because it makes important decisions easy to find and difficult to misinterpret.
Technical Drawings
Include clear front and back flat drawings. Add side, interior, or detail views whenever the construction cannot be understood from the main views.
Your drawings should show:
- Panel and seam positions
- Collar, cuff, waistband, and hem construction
- Pocket shape and placement
- Openings and closures
- Pleats, gathers, ruffles, or tucks
- Hood construction
- Contrast panels
- Topstitching
- Decorative placements
- Label locations
Fashion illustrations communicate mood, proportion, and styling. They do not replace technical flats. A beautiful sketch may show how a dress moves, but it rarely explains how the lining is attached or where the zipper ends.
Measurement Specification
Your measurement chart should define every critical point of measurement, often shortened to POM.
Typical POMs include:
- Chest width
- Body length
- Shoulder width
- Sleeve length
- Armhole depth
- Neck width and drop
- Waist and hip width
- Front and back rise
- Inseam and outseam
- Thigh width
- Leg opening
- Hood height and width
Each measurement needs a method. “Body length” might be measured from the highest shoulder point, center-back neck, or another reference point. If you do not specify the method, your designer and pattern maker may produce different numbers while both believe they are correct.
Add tolerances as well. A tolerance defines the permitted variation in bulk production. The goal is not to pretend every sewn garment will be identical to the millimeter. The goal is to define what variation your brand considers acceptable.
Base Size, Size Range, and Fit Direction
State the base sample size and the complete size range. Explain whether the fit should be slim, regular, relaxed, oversized, cropped, or layered.
Where useful, include body measurements and garment measurements separately. Garment measurements incorporate ease; body measurements describe the intended wearer.
Kidswear grading deserves particular attention because children do not grow at the same rate in every dimension. Height, chest, waist, rise, sleeve length, neck opening, and head size change differently. Applying one percentage to every measurement often creates poor proportions at the smallest or largest sizes.
Bill of Materials
The bill of materials, or BOM, lists everything used to make and pack the garment.
It can include:
- Main fabric
- Contrast fabric
- Rib
- Lining
- Interlining
- Padding
- Sewing thread
- Elastic
- Zippers
- Buttons and snaps
- Drawcords and toggles
- Embroidery thread
- Print ink
- Appliqué materials
- Main label
- Size label
- Care label
- Hangtag
- Barcode sticker
- Polybag or paper sleeve
- Carton requirements
For each item, record the specification, supplier or approved source where known, color, size, placement, and usage.
A complete BOM becomes especially valuable when you reorder. Without it, a factory may reproduce the silhouette while using a different elastic, thread, zipper finish, or packaging material.
Artwork and Placement
Supply production-ready files for prints, embroidery, appliqué, patches, and transfers. Vector files are usually preferable because they can be resized without losing clarity.
Confirm:
- Finished artwork dimensions
- Placement measured from fixed garment points
- Color references
- Technique
- Texture or hand-feel expectations
- Backing requirements
- Maximum stitch or color count
- Wash-performance expectations
Do not rely on “centered on the chest.” A graphic can be mathematically centered on a pattern piece yet look too low when the garment is worn. Use placement measurements and review the physical sample.
Construction Details
Document the construction details that affect appearance, comfort, durability, or safety:
- Seam type
- Stitch type
- Stitch density
- Seam allowance
- Reinforcement and bartacks
- Topstitch width
- Binding method
- Elastic attachment
- Hem finish
- Thread color
- Internal seam treatment
You do not need to micromanage every standard factory operation. Give the manufacturer room to use proven methods where the outcome is not design-critical. Be precise where the method changes the fit, look, durability, or user experience.
Labels and Packaging
Your tech pack or a linked packaging specification should also cover:
- Main brand label
- Size label
- Fiber and care label
- Country-of-origin information
- Tracking code
- Safety or sleepwear labels where applicable
- Hangtag
- Barcode type and data
- Folding method
- Individual packaging
- Carton assortment and carton marks
These details are part of the product, not an administrative task to solve after sewing.
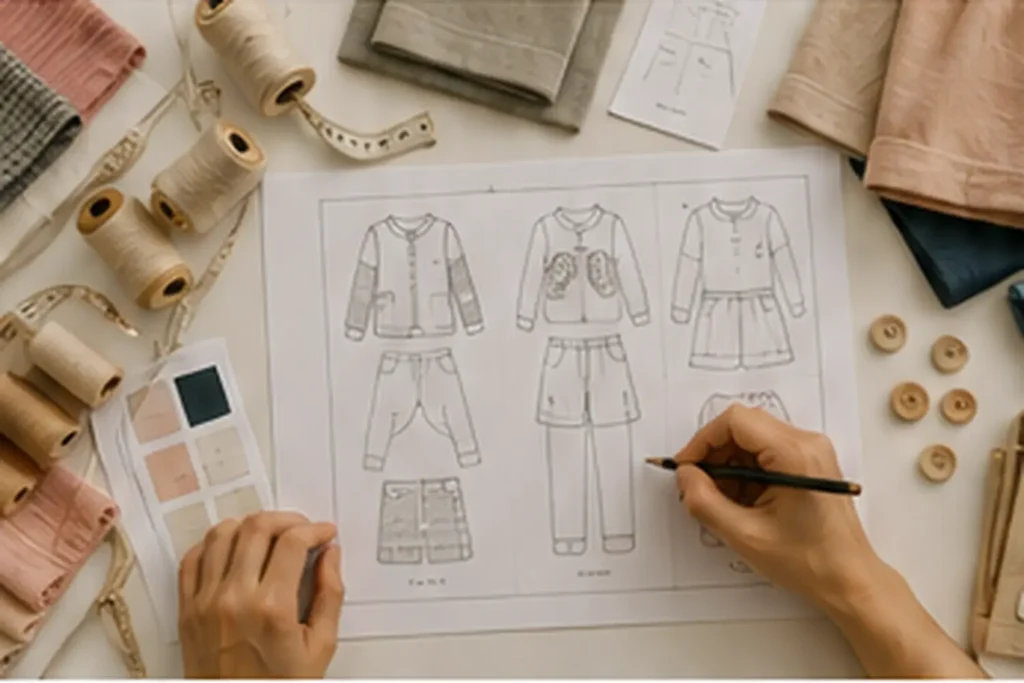
A clear tech pack aligns garment construction, materials, colors, and measurements before sampling.
What If You Do Not Have a Complete Tech Pack?
You can still begin.
We often receive projects that start with a mood board, rough sketch, reference garment, or a list of desired changes. An experienced development team can help translate that material into a pattern and specification.
However, the missing decisions do not disappear. They move into the development stage.
You should expect additional questions, a longer quotation process, and possibly more sampling rounds. You may also need help defining:
- Measurements
- Fabric performance
- Construction
- Trim specifications
- Artwork placement
- Size grading
- Label content
- Packaging
The most productive approach is to be honest about what is decided and what remains open. A manufacturer can help you solve an undefined detail. It cannot reliably manufacture around a hidden assumption.
Stage 3: Feasibility Review Before Quotation
Once your brief and tech pack arrive, the factory should conduct a technical review before issuing a firm quotation.
This is where experienced production teams identify conflicts between the design, material, quantity, target cost, safety requirements, and timeline.
What the Factory Evaluates
The review may cover:
- Product complexity
- Pattern feasibility
- Fabric availability
- Fabric minimums
- Trim availability
- Decoration limitations
- Sewing operations
- Size range
- Testing needs
- Label and packaging requirements
- Order quantity
- Production capacity
- Target cost
- Delivery date
A responsible supplier will ask questions. That is a positive sign when the questions are specific and lead toward decisions.
We have seen designs where a print crosses a bulky side seam, an embroidery is too dense for a lightweight jersey, or a neckline is visually elegant but unlikely to pass comfortably over a toddler’s head. These issues are cheaper to solve in a technical review than after a sample has been made.
Design for Manufacturing
Design for manufacturing does not mean stripping personality from your collection. It means preserving the idea while making the product stable enough to reproduce.
A factory might recommend:
- Moving artwork away from a seam
- Increasing a narrow seam allowance
- Replacing a brittle decorative component
- Reducing embroidery density
- Adjusting elastic width
- Adding reinforcement
- Changing the fabric weight
- Simplifying an invisible internal operation
- Altering a neck opening or closure
You should expect the manufacturer to explain why a change is recommended. You should also retain control over whether the visual trade-off is acceptable.
The best result usually comes from collaboration: you protect the brand identity, while the factory protects manufacturability and consistency.
Stage 4: Costing, MOQ, and Commercial Alignment
A reliable quotation is based on specifications, not just a picture.
The cost of a children’s garment may include:
- Fabric consumption
- Fabric price
- Dyeing or printing
- Trims
- Labels
- Cutting
- Sewing operations
- Decoration
- Washing or finishing
- Testing
- Individual packaging
- Cartons
- Overhead
- Order quantity
Two garments that use similar amounts of fabric can have very different costs. A basic jersey T-shirt may require a small number of operations. A lined dress with layered tulle, beadwork, embroidery, and an invisible zipper demands more skilled labor, handling, finishing, and inspection.
Why MOQ Is Not One Number
MOQ means minimum order quantity, but several different minimums may affect your program:
- Factory MOQ per style
- MOQ per color
- Fabric-mill dyeing minimum
- Custom print minimum
- Embroidery setup minimum
- Custom zipper or button minimum
- Woven-label minimum
- Packaging minimum
This is why a factory may accept 100 garments while a mill requires substantially more fabric for a custom dye lot.
Possible solutions include:
- Choosing stock fabric
- Using available colors
- Sharing one fabric across several styles
- Paying a small-lot surcharge
- Purchasing surplus fabric for reorders
- Increasing the quantity
A sensible MOQ plan reduces inventory risk without forcing the factory to hide unavoidable setup costs inside an unrealistic unit price.
Treat Early Prices as Conditional
If the fabric, trim, artwork, packaging, or size range remains undecided, the first quotation should be treated as an estimate.
Ask what assumptions the quotation uses. Confirm whether it includes:
- Sample fees
- Custom labels
- Individual packaging
- Laboratory testing
- Freight
- Duties and taxes
- Special finishing
Price transparency at this stage protects both sides. A low number built on incomplete assumptions is not a bargain; it is a future negotiation waiting to happen.
Stage 5: Source and Approve Fabrics and Trims
Material sourcing is one of the most consequential stages in the kidswear OEM process. Fabric affects the fit, drape, comfort, print result, durability, wash performance, and perceived quality of the finished garment.
Define Performance, Not Just Composition
“100% cotton” does not tell the factory enough.
Two cotton jerseys can differ in:
- Yarn quality
- Knitting density
- Weight
- Surface smoothness
- Stretch
- Recovery
- Shrinkage
- Pilling
- Drape
- Hand feel
Describe the experience you want the customer to have. For example:
A soft cotton-rich jersey for everyday children’s T-shirts, approximately 190 gsm, with moderate stretch, good recovery, low shrinkage, a smooth print surface, and enough body to avoid transparency.
That description gives the sourcing team a target it can evaluate.
Stock Fabric or Custom Development?
Stock fabric is often faster and available at lower minimum quantities. It is useful for test collections, startup orders, standard colors, and shorter launch calendars.
Custom development gives you more control over:
- Fiber blend
- Fabric construction
- Weight
- Finish
- Color
- Functional performance
It also adds time, minimums, and approval steps.
Neither route is automatically more professional. The better choice is the one that supports your customer promise and commercial reality.
Review Swatches and Lab Dips Carefully
For custom dyeing, the mill normally produces lab dips. Review them against an approved color standard under suitable lighting.
Remember that color appearance changes with fiber, texture, and finish. A cotton jersey and a woven twill may use a closely matched dye target yet reflect light differently. For coordinated sets, judge the materials together rather than approving each one in isolation.
Evaluate Every Trim as Part of the Garment
Buttons, snaps, zippers, cords, elastic, labels, and decorative parts affect function and safety.
Review:
- Material
- Color
- Size
- Finish
- Strength
- Availability
- Wash performance
- Skin contact
- Attachment method
- Age suitability
A metal snap that looks excellent on a sample still needs stable function and secure attachment in production. A decorative patch may need a softer backing if it sits against the skin.
Stage 6: Pattern Development and the First Prototype
At this point in the kidswear OEM process, the decisions on paper begin to influence fit, movement, and production efficiency.
The pattern maker converts your drawings and measurements into shapes that can be cut and assembled.
This stage requires judgment. The pattern must account for:
- Body proportions
- Garment ease
- Fabric stretch
- Drape
- Seam construction
- Shrinkage
- Movement
- Dressing
- Intended silhouette
Choose a Useful Base Size
Sampling usually begins with one base size. It should be representative enough to evaluate proportion, construction, and fit.
The best base size is not always the middle number in the range. It depends on your customer, product category, and grading strategy.
Design for Movement
Children’s clothing should support real movement. Your fit review should consider sitting, reaching, bending, crawling, running, and dressing—not only how the garment looks when standing still.
Ease needs to be intentional. Too little restricts movement. Too much can make the product look careless and may create issues in specific categories.
For diaper sizes, rise, seat, and leg opening require additional room. For outerwear, the pattern must accommodate layers. For stretch basics, fabric recovery matters as much as the initial measurement.
Do Not Ignore the Neck Opening
A neckline can look proportionate on paper but be difficult to pull over a child’s head.
Possible solutions include:
- Increasing neck stretch
- Adjusting rib composition
- Enlarging the opening
- Adding shoulder snaps
- Adding a back opening
- Changing the binding construction
We have learned to treat the neck opening as a functional measurement, not simply a design line. It is one of those small details parents notice immediately when dressing a child.
Stage 7: Sample Development and Fit Approval
Sampling is where the digital product becomes physical. It is also where your team should discover problems—while they are still affordable to correct.
HAPA’s product sample development service illustrates how a project can move from an idea or specification through material, fit, and workmanship evaluation before bulk production.
Common Sample Stages
Factories use different names, but your program may include:
Development Sample
Used to evaluate the design direction, construction, proportions, and material concept. Substitute materials may be used if final fabric is not ready.
Fit Sample
Used to review measurements, balance, comfort, mobility, and silhouette. Fit should be assessed on an appropriate model or mannequin where possible.
Print or Embroidery Sample
Used to approve artwork size, position, color, stitch density, hand feel, and compatibility with the fabric.
Size Set
Used to check selected or all graded sizes. It reveals proportion problems that a single base-size sample cannot show.
Pre-Production Sample
The PP sample should represent the final product as closely as possible, using approved fabric, colors, trims, pattern, decoration, labels, and construction.
Once approved, it becomes a key reference for the production line and quality team.
Shipment Sample
Taken from completed bulk production for buyer records, evaluation, or final confirmation.
Give Comments the Factory Can Act On
“Make the sleeve better” is not a production instruction.
Effective sample comments are measurable and specific:
- Reduce the sleeve opening by 1 cm
- Increase body length by 1.5 cm
- Move the chest print 2 cm upward
- Reduce embroidery width from 12 cm to 10 cm
- Use softer backing behind the embroidery
- Increase waistband elastic recovery
- Change the collar rib to a denser construction
Mark changes on photographs or drawings. Consolidate feedback from your team before sending it.
Most importantly, update the tech pack after approval. If the latest correction exists only in an email thread, another department can easily miss it.
Avoid Endless Sampling
Sampling becomes expensive when the objective changes after every round.
Common causes include:
- Redesigning instead of correcting
- Conflicting feedback from several decision-makers
- Late fabric changes
- New artwork after fitting
- Unclear target customer
- Failure to measure the sample
- Failure to update the tech pack
Before reviewing each sample, agree on what that sample is intended to prove. Separate fit comments from design changes. Appoint one person to issue final approval.
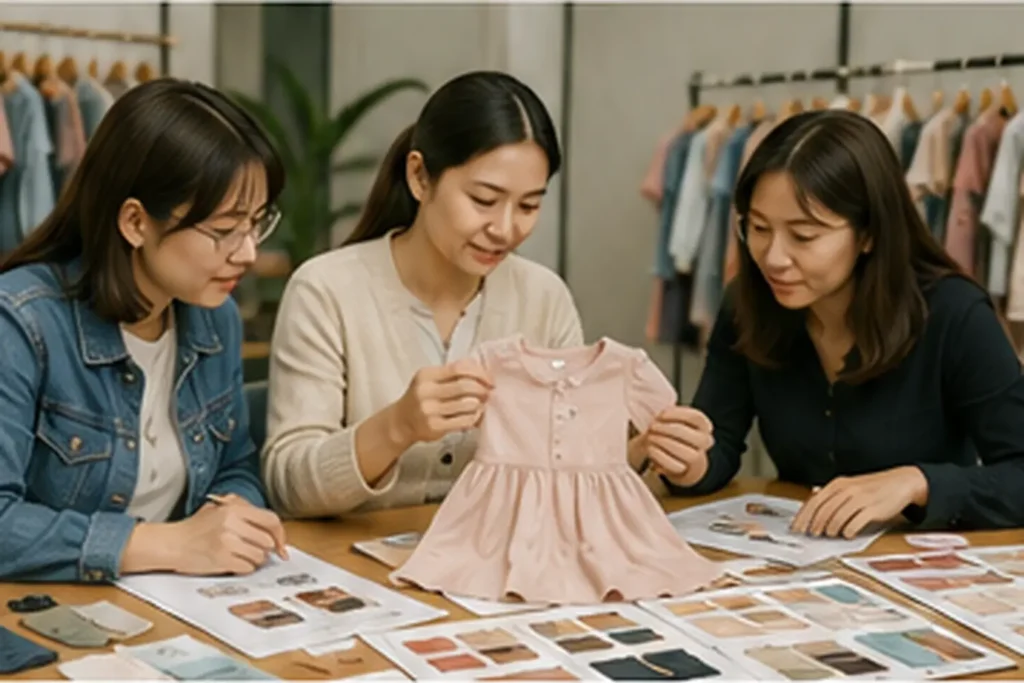
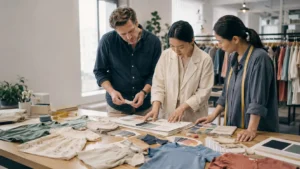
Sample reviews help the buyer and development team confirm fit, fabric, construction, and styling details.
Stage 8: Size Grading and the Size Set
Once the base pattern is approved, it is graded into the full size range.
Good grading maintains the product’s visual identity while adapting it to changing body proportions.
The grader may adjust:
- Body length
- Chest and waist
- Shoulder width
- Sleeve length and width
- Rise and inseam
- Neck opening
- Armhole
- Hood dimensions
- Pocket size and placement
- Artwork scale and placement
A size set matters because grading errors often appear at the extremes.
You may discover:
- A pocket looks oversized on the smallest size
- Artwork appears too small on the largest size
- A hood becomes too heavy
- Sleeve width grows too quickly
- A neck opening becomes loose
- Rise increases disproportionately
Reviewing a size set before bulk cutting is far less expensive than discovering the problem in finished inventory.
Stage 9: Develop Prints, Embroidery, and Special Decoration
Decoration gives kidswear character, but it adds technical variables.
Screen Printing
Confirm ink type, color count, dimensions, placement, curing, hand feel, stretch, and wash durability.
A large print on stretch fabric may crack if the ink system and curing process are not suitable.
Digital Printing
Digital printing can reproduce detail and gradients, but the result depends on fabric composition, pretreatment, ink, color profile, and heat setting.
Approve the print on the actual or representative bulk fabric.
Heat Transfers
Test adhesion, stretching, cracking, peeling, color migration, and repeated laundering. Some transfers that look clean immediately after pressing deteriorate after storage or washing.
Embroidery
Embroidery density must suit the fabric. Heavy stitching on lightweight jersey can cause puckering, stiffness, distortion, or irritation.
The technician may need to change:
- Stitch density
- Underlay
- Backing
- Needle
- Thread
- Artwork size
Sequins, Beads, Appliqué, and Specialty Finishes
For decorative kidswear, visual quality is only part of the review.
Check:
- Attachment strength
- Sharp edges
- Loose components
- Skin contact
- Wash durability
- Flexibility
- Weight
- Age suitability
Complex decoration should be engineered into the product, not added at the end because the sample looks “too simple.”
Stage 10: Plan Compliance Before Bulk Production
Compliance planning belongs inside product development, not at the shipping deadline.
The applicable requirements depend on the destination, age group, product classification, materials, trims, decoration, and intended use.
For products sold in the United States, the CPSC’s Children’s Product Certificate guidance explains that certification must identify the product and the applicable rules, and must be supported by the required testing. The CPSC tracking-label guidance also explains the permanent identifying information expected on children’s products and, where practicable, their packaging.
Depending on the garment, your compliance plan may address:
- Clothing textile flammability
- Children’s sleepwear requirements
- Lead in surface coatings
- Lead in accessible components
- Phthalates where applicable
- Cords and drawstrings
- Fiber-content labeling
- Care labeling
- Country-of-origin information
- Chemical restrictions
- Small-component security
- Tracking and batch information
The FTC care-labeling guidance is an authoritative starting point for understanding U.S. care-instruction responsibilities for covered apparel.
Do Not Order a Generic “Compliance Test”
There is no single test package that suits every children’s garment.
A plain cotton T-shirt, plastic-coated bib, padded jacket, sequined dress, and tight-fitting pajama set have different components and risks.
Provide the laboratory with:
- Product description
- Age range
- Intended use
- Destination market
- Bill of materials
- Photographs or sample
- Prints and coatings
- Trims
- Packaging and warnings
The laboratory or qualified compliance adviser can then help identify applicable tests.
Test Production-Representative Materials
The test sample should represent what you intend to sell.
If the tested garment uses one ink and bulk production uses another, the report may not support the final goods. The same concern applies to fabric suppliers, trim coatings, buttons, non-slip prints, and finishes.
Control material changes after testing and keep records that connect the approved components to the production lot.
Clarify Responsibility
The manufacturer can help prepare samples, provide material and factory information, coordinate testing, and maintain production records.
The brand, importer, or legally responsible business still needs to determine the destination-market obligations and issue the required certification where applicable.
A professional supplier should support the process without pretending that one factory certificate replaces every legal responsibility.
Stage 11: Approve the Pre-Production Standard
The pre-production stage is the final checkpoint before the order becomes expensive to change.
Your team and factory should confirm:
- Final tech pack
- Approved pattern
- Measurement chart and tolerances
- Graded sizes
- Fabric and colors
- Trims
- Artwork
- Labels
- Packaging
- Testing plan
- Quantity and size ratio
- Delivery schedule
- Approved PP sample
Hold a Pre-Production Meeting
A proper PP meeting aligns merchandising, pattern, cutting, sewing, decoration, finishing, quality control, and packing.
The approved sample should be available. Critical construction points should be explained. Known risks should be highlighted rather than hidden.
At HAPA, we consider this meeting one of the most important control points in the kidswear OEM process. It is where a decision made by the designer becomes an instruction understood by the production floor.
Use Real Version Control
Every production document should show:
- Style number
- Version number
- Revision date
- Approval status
- Buyer approval
- Factory confirmation
File names such as `final-new-latest-2.pdf` invite errors. The line should never have to guess which document is current.
Stage 12: Inspect Bulk Materials Before Cutting
When bulk fabric arrives, it should be inspected before the factory commits it to production.
Checks may include:
- Fabric width
- Weight
- Color
- Shade variation
- Surface defects
- Holes and stains
- Knitting or weaving faults
- Bowing and skew
- Shrinkage
- Quantity
Fabric rolls may be grouped by shade so visible panels within one garment are cut from compatible rolls.
Test Shrinkage
Fabric can change during washing, steaming, printing, and finishing. The pattern may need shrinkage allowance.
Do not assume the shrinkage result from the sample fabric will match a different bulk lot. Confirm the production material when the risk is meaningful.
Inspect Trims Too
Compare bulk buttons, snaps, zippers, labels, elastic, and decorative parts with the approved standard.
A tiny difference in elastic recovery can change fit across the full order. A slightly different label fold can create discomfort. A zipper finish can alter the appearance of an otherwise matching set.
Stage 13: Marker Making, Fabric Relaxation, and Cutting
Cutting accuracy establishes the foundation for sewing accuracy.
HAPA’s overview of cut-and-sew manufacturing provides additional context on how pattern, cutting, assembly, and finishing work together in custom apparel production.
Fabric Relaxation
Knitted and stretch fabrics may need to rest after being unrolled. Fabric stored under tension can change dimensions. Relaxation helps stabilize it before spreading and cutting.
Marker Making
The marker arranges pattern pieces across the usable fabric width. The objective is to reduce waste while preserving:
- Grain direction
- Nap direction
- Print orientation
- Stripe or plaid alignment
- Shade grouping
- Pattern accuracy
Fabric efficiency matters, but the cheapest marker is not always the right marker if it compromises garment consistency.
Spreading and Cutting
During spreading, the team controls layer alignment, tension, face direction, defects, and fabric orientation.
Cutting may use straight knives, band knives, die cutting, manual tools, or automated systems, depending on the product and production scale.
After cutting, pieces are bundled by style, color, size, shade, and cut number. Bundle records help trace problems if a measurement or shade issue appears later.
Stage 14: Set Up Bulk Sewing
Bulk sewing is the most visible part of the kidswear OEM process, but its consistency depends on every approval made before the line starts.
The sewing line breaks the garment into repeatable operations.
A basic T-shirt may require shoulder joining, collar attachment, sleeve setting, side-seam closing, hemming, labeling, and thread trimming. A lined dress or technical jacket may involve dozens of operations.
Start With a Pilot or First Piece
Before full line production, the factory should make and inspect a first piece or small pilot quantity.
The team reviews:
- Machine settings
- Seam appearance
- Measurements
- Operation sequence
- Label placement
- Artwork placement
- Pressing
- Workmanship
This catches misunderstandings before hundreds of garments move through the same operation.
Balance the Line
Some operations take longer than others. Supervisors allocate workers, machines, and work-in-progress to prevent bottlenecks.
Poor line balance can create rushed work at one station and idle time at another. Stable production requires both efficiency and quality control.
Train Operators on Unusual Details
If your garment includes a nonstandard seam, delicate decoration, or special finish, operators need clear instructions and an approved reference.
A production floor is not the place for undocumented assumptions.
Stage 15: Control Quality While the Garments Are Being Made
Final inspection is important, but it is too late to be your first serious quality check.
The complete kids clothing manufacturing process shows how material preparation, sewing, inspection, and finishing connect across production rather than functioning as isolated tasks.
In-line inspectors may check:
- Measurements
- Stitch density and tension
- Seam strength
- Alignment and symmetry
- Print or embroidery placement
- Shade consistency
- Label position
- Trim attachment
- Workmanship
- Safety concerns
Correct the Cause, Not Only the Garment
When a repeated defect appears, the factory should identify the source.
Possible causes include:
- Wrong machine tension
- Worn or incorrect needle
- Pattern or cutting error
- Fabric instability
- Incorrect folder or guide
- Operator method
- Misunderstood instruction
- Wrong trim
- Pressing temperature
Removing defective pieces without fixing the cause allows the same problem to continue.
One lesson manufacturing teaches quickly is that ten defective garments are a correction; ten thousand are a business problem. In-line control keeps the issue closer to ten.
Stage 16: Finishing, Measurement, and Final Inspection
After sewing, garments move through finishing. Depending on the product, this may include:
- Thread trimming
- Stain removal
- Garment washing
- Brushing
- Pressing
- Shape correction
- Measurement checks
- Label checks
- Metal detection where required
- Final appearance review
Press for the Fabric, Not for Speed
Heat and pressure should suit the material and decoration. Excessive heat can damage synthetics, transfers, elastic, sequins, coatings, and delicate surfaces.
Recheck Measurements After Finishing
Washing, steaming, and pressing can change dimensions. Finished garments should be measured against the approved specification and tolerance.
Out-of-tolerance products may require rework, sorting, downgrading, or rejection according to the agreed standard.
Use an Agreed Final Inspection Standard
Final inspection may be conducted by factory QC, buyer QC, a buying office, or an independent inspection company.
Many buyers use an AQL-based sampling plan with critical, major, and minor defect classifications.
The inspection may cover:
- Quantity
- Workmanship
- Measurements
- Color and shade
- Fabric defects
- Prints and embroidery
- Trim attachment
- Labels
- Barcodes
- Packaging
- Carton assortment
- Carton marks
- Safety-related defects
A passing inspection confirms that the sampled finished goods meet the agreed standard. It does not compensate for weak production control earlier in the process.
Stage 17: Build a Retail-Ready Label and Packaging System
A product is not finished when the last seam is sewn. It is finished when the correct SKU can move through your warehouse and reach the customer in the expected condition.
If you need a broader overview of branding options, HAPA’s private-label clothing manufacturing service covers custom labels, hangtags, and branded packaging for kidswear collections.
Verify Every Label
Confirm:
- Main brand label
- Size label
- Fiber composition
- Care instructions
- Country of origin
- Responsible-business information where required
- Tracking code
- Safety wording where applicable
- Hangtag
- Barcode
The garment label, polybag sticker, carton mark, purchase order, and packing list should all use matching style, color, and size data.
Approve the Folding Standard
Provide a folding diagram or approved packed sample.
Specify:
- Front or back presentation
- Sleeve position
- Collar position
- Tissue placement
- Hangtag position
- Barcode position
- Size sticker position
- Arrangement of multi-piece sets
Good folding protects the garment, improves carton efficiency, and creates consistent presentation.
Match Packaging to the Sales Channel
Options include:
- Clear polybag
- Recycled-content bag
- Paper sleeve
- Branded mailer
- Fabric pouch
- Gift box
A wholesale store order, Amazon fulfillment shipment, and direct-to-consumer subscription box have different requirements.
Do not add packaging simply because it looks premium in a product photograph. Consider protection, dimensions, labor, freight, recycling requirements, and warehouse handling.
Confirm Carton Packing
Cartons may be packed by solid size, assortment, color, or retailer-specific ratio.
Carton marks can include:
- Buyer
- Purchase order
- Style
- Color
- Size or assortment
- Quantity
- Carton number
- Gross and net weight
- Dimensions
- Country of origin
- Destination
The packing list and physical cartons must agree.
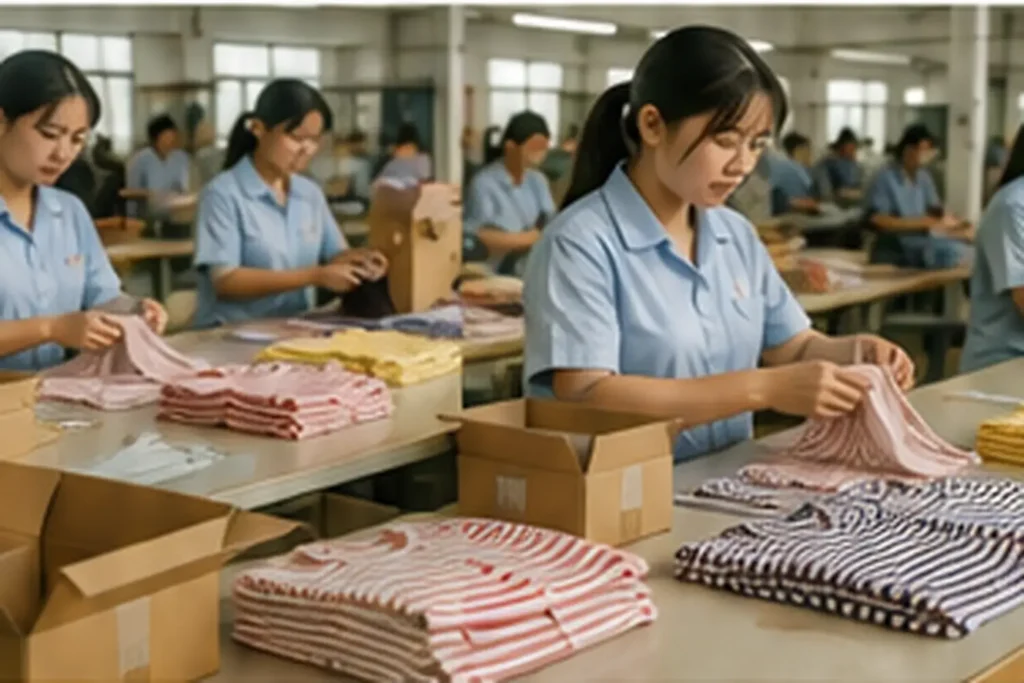
Final quality checks and organized packing prepare finished kidswear for international delivery.
Stage 18: Prepare Shipping and Export Documents
Before goods leave the factory, the commercial and logistics records must be complete.
Depending on the destination and agreement, documents may include:
- Commercial invoice
- Packing list
- Bill of lading or airway bill
- Certificate of origin
- Inspection report
- Test reports
- Compliance certificates
- Customs declaration
- Harmonized tariff classification
- Insurance document
The factory, freight forwarder, importer, and customs broker should agree on responsibilities before cargo is booked.
Understand the Incoterm
Common Incoterms in apparel sourcing include EXW, FOB, CIF, and DDP.
Do not compare offers by the Incoterm label alone. Confirm who pays for and manages:
- Factory pickup
- Export clearance
- Origin terminal charges
- Freight
- Insurance
- Import clearance
- Duty and tax
- Destination handling
- Final delivery
A lower garment price can become a higher landed cost if these responsibilities are misunderstood.
Stage 19: Freight, Customs, and Final Delivery
The final stage of the kidswear OEM process moves the goods from packed cartons to your warehouse or fulfillment center.
Express Courier
Best for samples, documents, urgent replacements, and small shipments. Fast, simple, and expensive at scale.
Air Freight
Useful for urgent launches, medium-size shipments, and higher-value products. Faster than sea freight, but cost is sensitive to chargeable weight and fuel rates.
Sea Freight
Usually the most economical option for larger orders. It requires more time for booking, port handling, transit, customs, and inland delivery.
Plan Backward From Warehouse Availability
Your factory completion date should not be your launch date.
Allow time for:
- Final inspection
- Packing and booking
- Export procedures
- International transit
- Customs clearance
- Warehouse appointment
- Receiving and inventory checks
- Product photography
- E-commerce setup
- Retail distribution
- Contingency
We encourage buyers to plan from the date stock must be available for sale, then work backward through logistics, production, approvals, and development.
A Realistic Kidswear OEM Timeline
Every product has its own schedule, but a planning framework may look like this:
| Stage | Typical Planning Range |
| Brief, tech pack review, and initial costing | 3–7 days |
| Fabric and trim sourcing | 1–3 weeks |
| First sample | 1–3 weeks |
| Each major sample revision | 1–3 weeks |
| Size set and PP sample | 1–2 weeks |
| Testing | Depends on product and market |
| Bulk material preparation | 2–5 weeks |
| Bulk production | 3–8 weeks |
| Final inspection and packing | Several days to 2 weeks |
| International delivery | Depends on route and destination |
These are planning ranges, not guarantees.
Custom fabric, complicated decoration, peak-season capacity, laboratory turnaround, repeated revisions, or delayed approvals can extend the timeline.
Your response speed matters as well. Production cannot begin while a lab dip, sample, or packaging file remains unapproved.
Where the Kidswear OEM Process Commonly Breaks Down
Most production problems are not random. They start at predictable control points.
An Incomplete Tech Pack
The factory fills gaps with assumptions.
Result: inconsistent quotations, repeated samples, and unclear production standards.
Price Approval Before Product Approval
The buyer chooses a supplier using an early estimate before fabric and construction are final.
Result: the price changes during development.
Constant Design Changes
The project continues redesigning after each sample instead of correcting toward a fixed objective.
Result: cost, delay, and version confusion.
Late Material Approval
Fabric or trim is confirmed after production capacity has been reserved.
Result: missed cutting dates and shipment windows.
Skipping the Size Set
Only the base size is checked.
Result: grading problems reach bulk production.
Compliance Testing at the End
Testing begins after the goods are made.
Result: limited options if a component fails.
Weak Version Control
Different departments use different files.
Result: samples, sewing, labels, and packaging do not match.
No In-Line Inspection
The first full review occurs after production is complete.
Result: repeated defects affect a large quantity.
Packaging Decisions After Sewing
Barcode, bag, folding, or carton instructions arrive late.
Result: finished goods wait in the factory.
Planning Only the Sewing Lead Time
Freight, customs, and warehouse receiving are excluded from the calendar.
Result: the product misses its commercial launch.
How You Can Make Your OEM Program Easier to Manage
Your role in the kidswear OEM process is not to operate the factory; it is to keep decisions clear, timely, and traceable.
You do not need to become a garment technician. You do need a disciplined decision process.
Send One Organized Product Package
Keep the tech pack, artwork, measurement chart, BOM, quantities, size ratio, packaging, and market requirements together.
Appoint One Final Decision-Maker
Your designer, founder, merchandiser, and marketing team can all contribute. One person should consolidate comments and issue the final instruction.
Respond on Time
If approval will take longer, tell the factory. A realistic date is more useful than silence.
Record Every Approved Change
Update the tech pack rather than relying on chat history.
Review Physical Samples Methodically
Check measurements, fit, fabric, construction, decoration, labels, packaging, and wash performance.
Maintain a Production Calendar
Track:
- Brief submission
- Quotation
- Material approval
- Sample delivery
- Sample comments
- PP approval
- Testing
- Cutting
- Sewing
- Inspection
- Shipment
- Warehouse arrival
Protect the Critical Path
Not every decision has the same impact. Fabric approval, sample approval, testing, and packaging data often control the schedule. Prioritize them.
How to Choose the Right Kidswear OEM Manufacturer
The lowest unit price does not always create the lowest total cost.
A weak supplier can add cost through repeated sampling, material waste, failed testing, rework, late delivery, returns, and lost customer trust.
Evaluate the following areas.
Relevant Kidswear Experience
Ask which age groups, products, materials, and decoration techniques the factory handles regularly.
Kidswear requires an understanding of comfort, movement, sizing, trim security, labeling, and category-specific risks.
Development Capability
Can the team work from a full tech pack, sketch, reference sample, or product concept? Can it support pattern making, grading, sourcing, artwork, and packaging?
Communication Quality
Good communication is not simply a fast reply.
A useful supplier:
- Asks specific questions
- Explains trade-offs
- Identifies risk
- Records decisions
- Provides realistic dates
- Says when something is not feasible
Quality System
Ask how the supplier controls incoming materials, cutting, sewing, decoration, measurements, finishing, packing, and final inspection.
Compliance Support
The manufacturer should understand that testing depends on the product and market. It should provide accurate production information and help coordinate representative samples without making vague claims that one certificate covers everything.
MOQ and Capacity Fit
A very large factory may not prioritize a small development order. A small workshop may struggle with a broad, complex collection. Choose a partner whose systems and capacity match your current program and future growth.
Transparency
Request factory information, production evidence, samples, inspection records, and business documents appropriate to your level of due diligence.
Frequently Asked Questions
Do I Need a Tech Pack to Begin?
A complete tech pack is the most efficient starting point, but you can begin with sketches, a reference garment, or a clear concept.
The manufacturer will still need to define the measurements, materials, construction, grading, labels, and packaging before production.
How Many Sample Rounds Should I Expect?
A straightforward product may need a development sample and a final PP sample. New fits, broad size ranges, custom fabric, or complex decoration may need additional rounds.
The number depends on the clarity of the first specification and how many new decisions are introduced during review.
When Is the Final Price Confirmed?
The price becomes most reliable when fabric, construction, trims, decoration, labels, packaging, quantity, size range, and testing requirements are defined.
An earlier quotation should state its assumptions.
Can I Approve Fit in One Color?
Often, yes. However, other colors, prints, coatings, trims, and decorations still need evaluation because materials and finishes can behave differently.
Who Owns the Pattern?
Pattern ownership should be defined in your agreement. Do not assume it automatically transfers with a sample fee.
Can I Change the Design During Bulk Production?
Minor corrections may be possible. Significant changes after cutting or sewing begins create waste, inconsistency, cost, and delay.
Approve major details before production.
Who Is Responsible for Compliance?
The factory can provide manufacturing data, material information, test samples, coordination, and records. The brand, importer, or legally responsible business must identify applicable rules and complete required certification.
What Happens If Final Inspection Fails?
The buyer and manufacturer should review the defect types, affected quantity, root cause, and corrective plan.
Possible actions include rework, sorting, replacement, reinspection, shipment delay, negotiated discount, or rejection in severe cases.
How Long Does the Full Process Take?
A simple style using available fabric may move relatively quickly. A collection with custom material, multiple sample rounds, detailed decoration, testing, and custom packaging can take several months before international delivery.
Build the schedule from your required warehouse date, not from the date you hope sewing will finish.
Final Thoughts
The kidswear OEM process is a chain of connected decisions. Each stage hands information and materials to the next.
A vague measurement becomes a poor-fitting sample. An unapproved material becomes inconsistent bulk fabric. An outdated artwork file becomes thousands of incorrect prints. A late barcode decision leaves finished garments waiting for packaging.
The reverse is equally true.
A clear brief gives the product direction. A practical tech pack gives the factory control. Careful sourcing protects the fabric and trim quality. Structured sampling confirms fit and construction. Pre-production approval aligns departments. In-line inspection catches problems while they are manageable. Accurate packaging and shipping records help your goods arrive ready for sale.
You do not need to manage every machine or technical calculation yourself. You do need a manufacturer that explains the process honestly, documents decisions carefully, and understands that your collection is not complete until the correct product reaches your market.
At HAPA, we support children’s apparel brands from early concepts and tech packs through sourcing, patterns, sampling, decoration, bulk production, quality control, private labeling, packaging, and delivery. Our role is not only to make the garment. It is to help create a production path your team can understand, approve, and repeat.
When you approach manufacturing as a system rather than a single purchase order, you gain more than better quality. You gain clearer costs, more reliable timelines, easier reorders, and a stronger foundation for growing your kidswear brand.